UPDATE 2: MoD reader Jon Chown provided the solution for a problem with this design, and revised instructions have been posted here . If you intend to build this model, you should use the revised instructions.
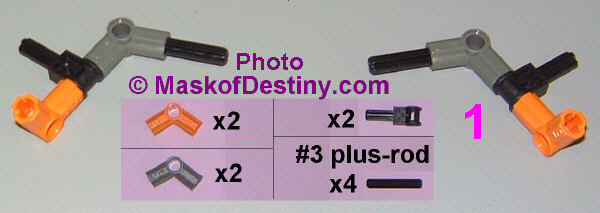
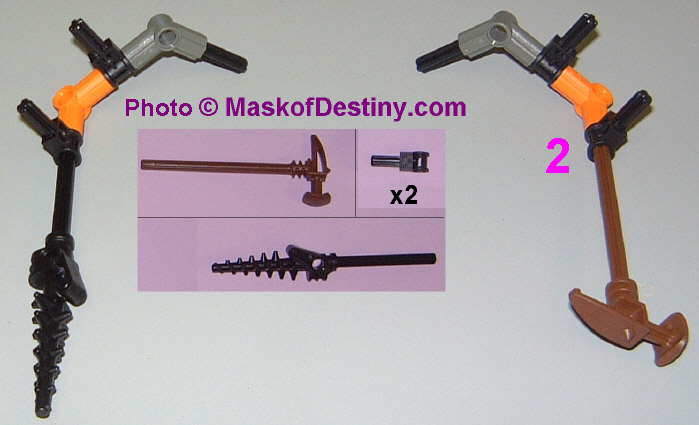
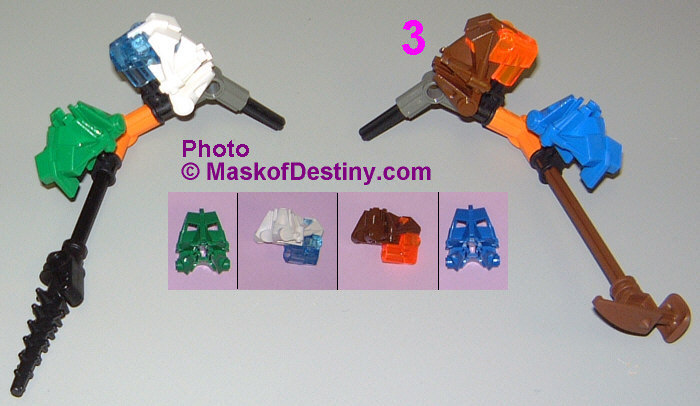
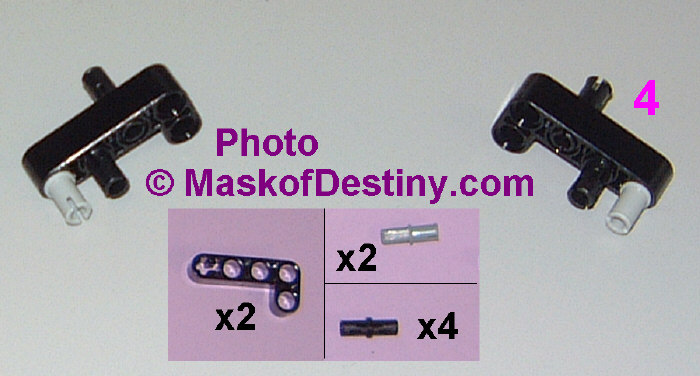
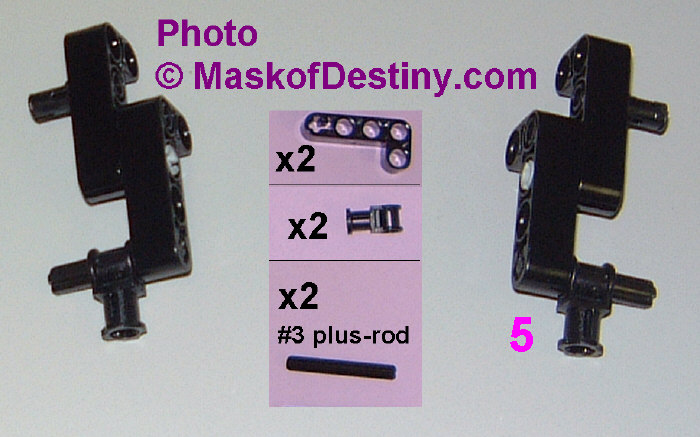
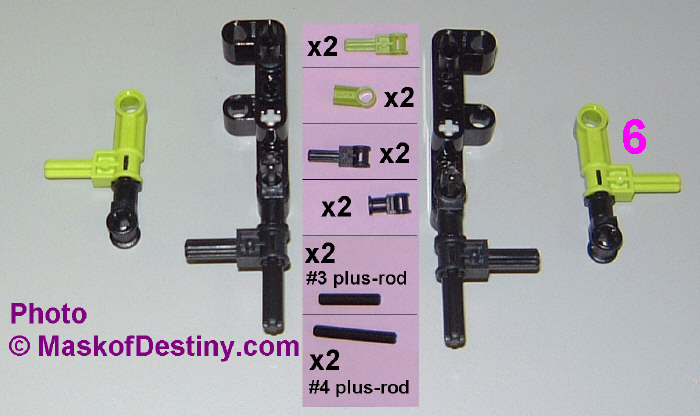
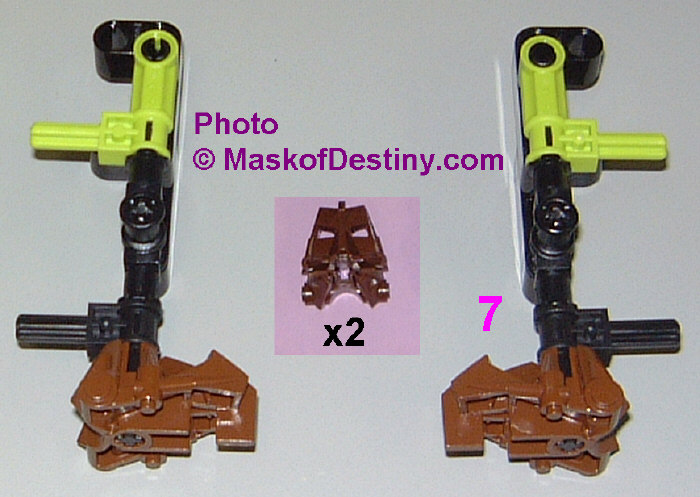
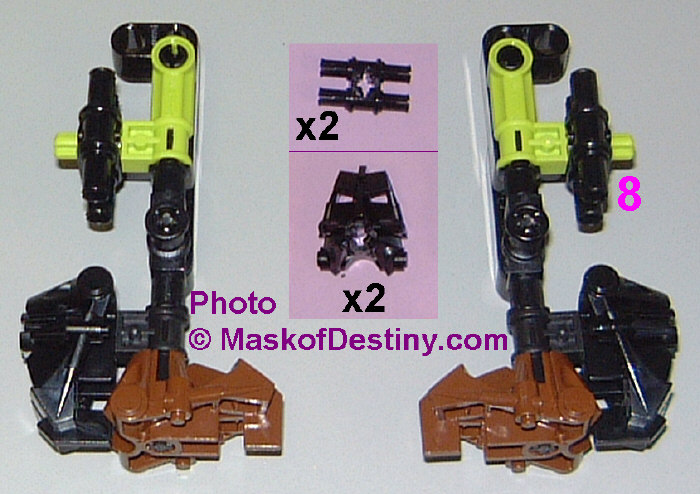
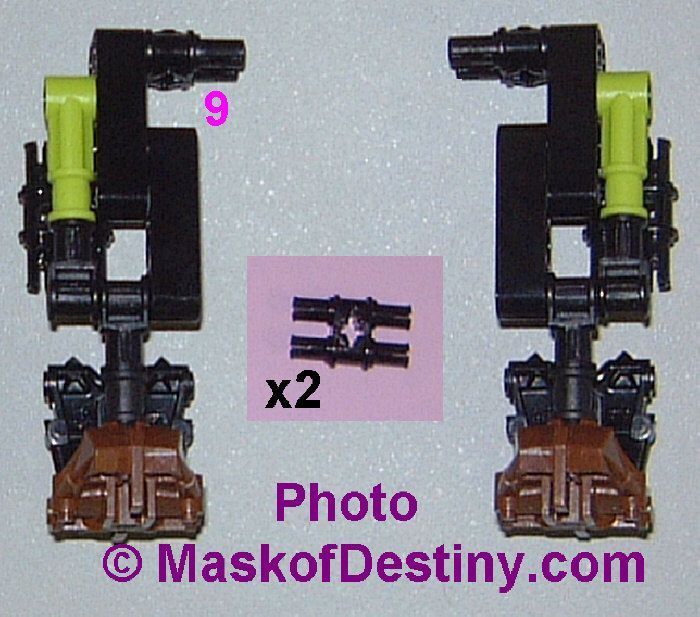
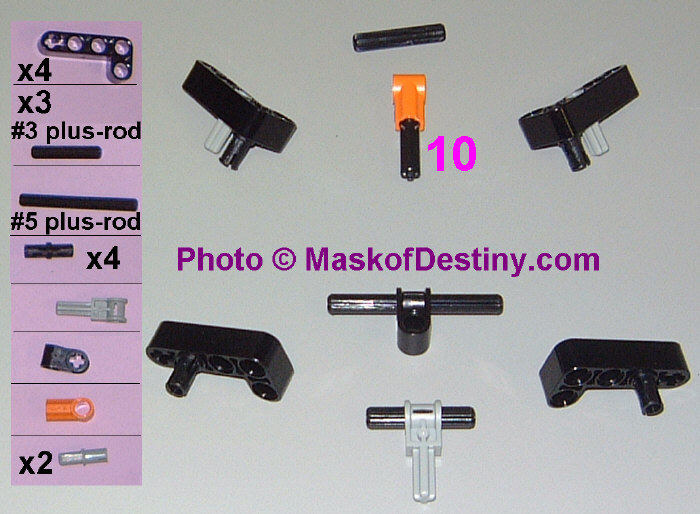
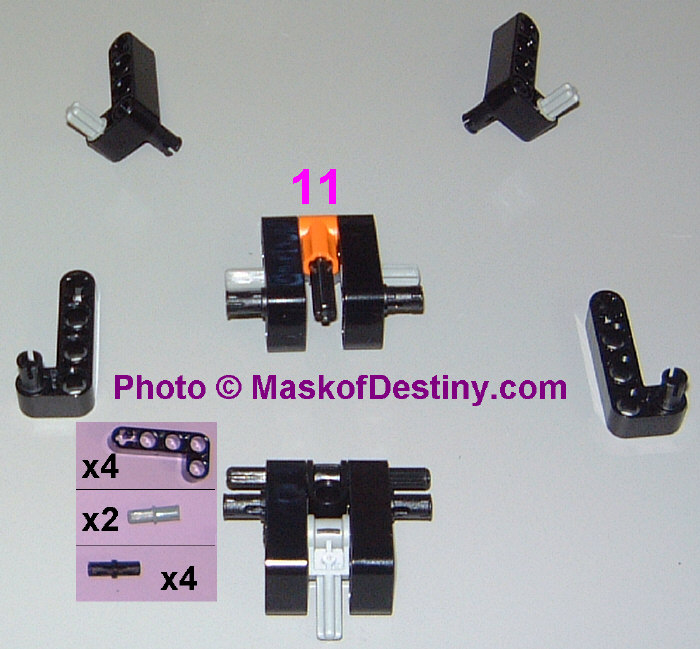
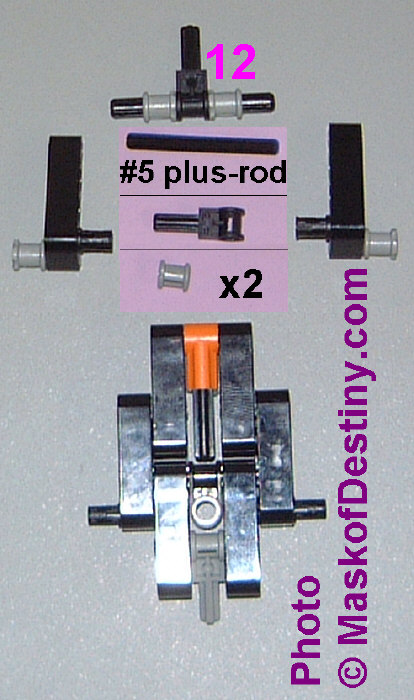
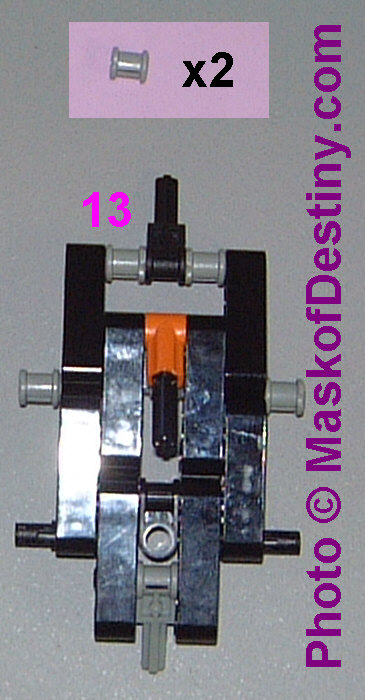
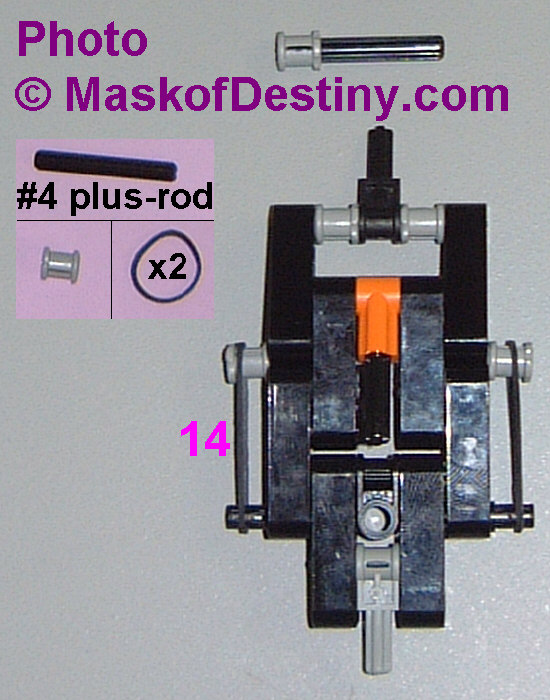
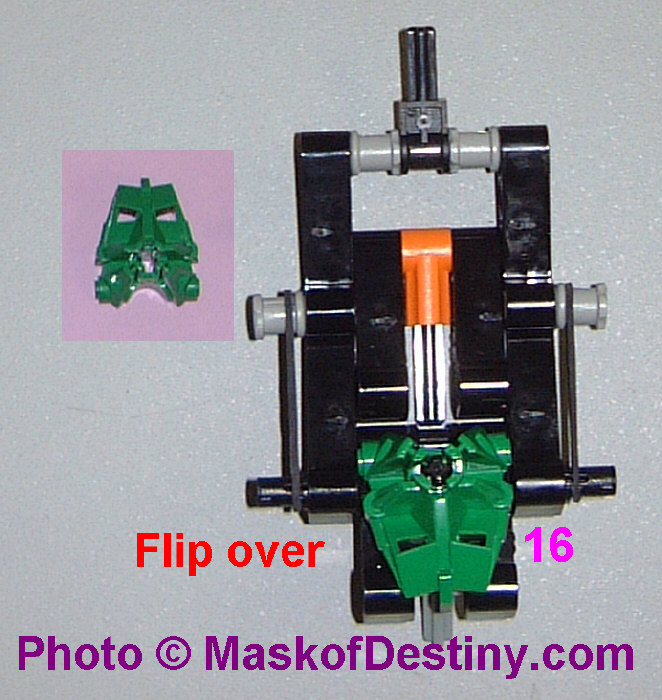
These are twenty-one steps that will take you through to a completed TURAGA NUI model. Each step includes a parts menu that shows exactly which new pieces you’ll need to add to the pictured assembly. I’ve never produced instructions for building a LEGO® model before, so this set is likely more compact than what LEGO® would have produced. If you’re completely stuck on a particular step, e-mail me and I’ll try to help you out.
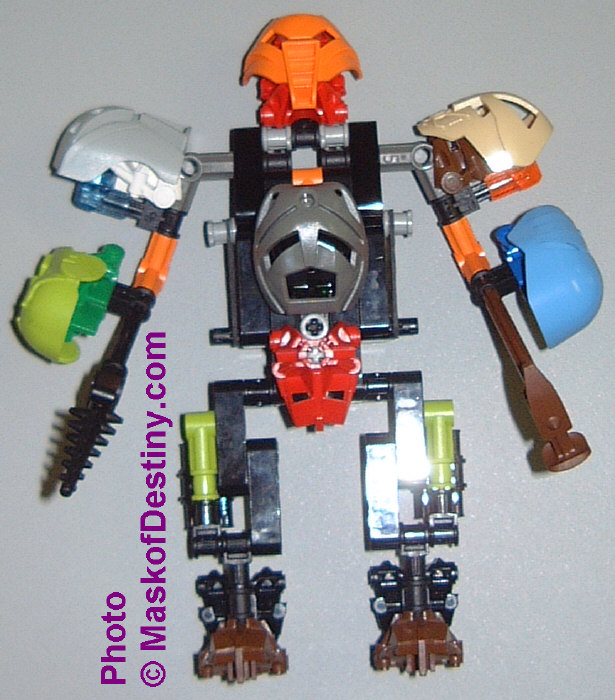
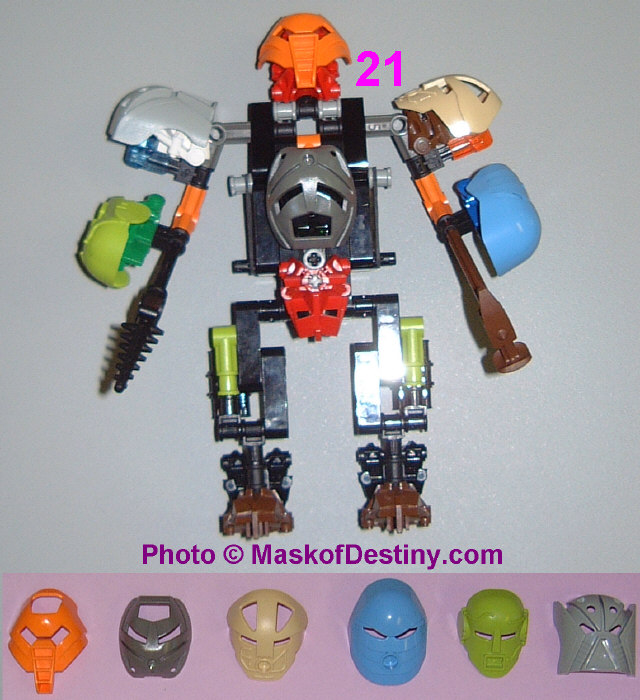
Putting these instructions on the site has involved about twelve hours on my part, so feel free to download them for personal use, but please DO NOT steal them to post on another webpage. I spent about ninety minutes trying to interpret the tiny picture on the back of the TURAGA box, but all I was able to figure out were the arms, legs, and a chunk of the shoulder/head assembly. The rest of the torso was hidden behind the two heads mounted to the front of the torso. On Wednesday (7-25-01) I stopped by Toys’R’Us and found TURAGA sets that shipped in 6-unit plastic sleeves instead of the 12-unit cardboard trays that I’d seen in two other stores. Shown on the front of the sleeve is a much larger picture of TURAGA NUI that is shown turned about 45 degrees to one side, which showed me most of what was hidden behind thosee heads. Kathy, a store employee, was cool enough to let me take an empty sleeve home and after spending a mere half-hour, I was able to complete the assembly. Photography, which wouldn’t yet be possible without the loan of my boss’ digital camera, took two hours, and editing the results took about six. Uploading the completed pictures and adding this article will probably run around two hours total.
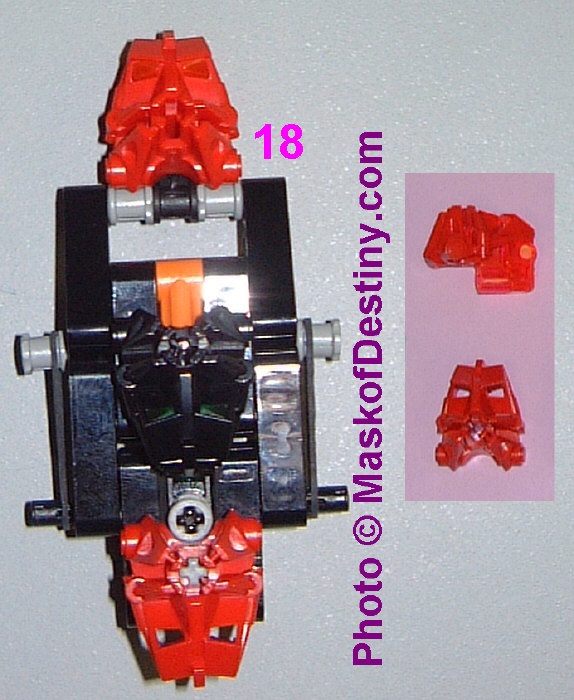
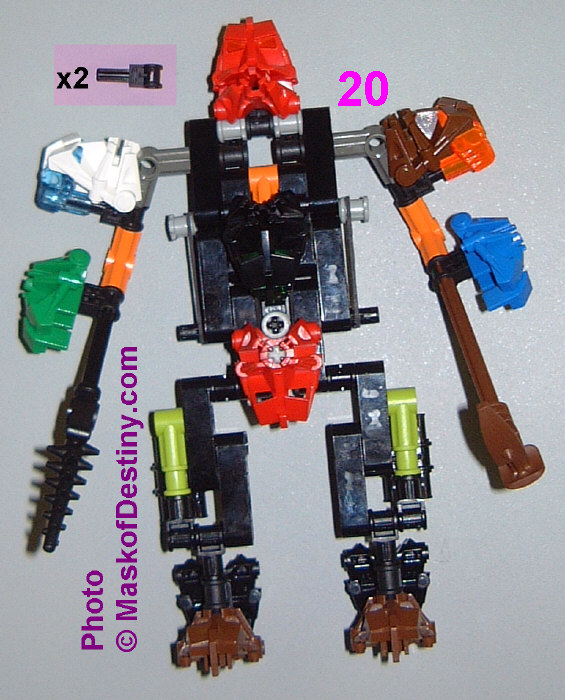
I can’t guarantee that this model is an exact duplicate of the ones photographed by LEGO®, but it is probably at least 95% correct. I did add a rubber band between the two heads on the front of the chest because the red one wouldn’t stay positioned correctly without it. Also, while not shown in my instruction set, I did realize that with the addition of two rubber bands, the arm weapons can be made much more effective. To do this, pull the head off and loop two rubber bands between the neck and one arm-lever each, just like the rubber bands used on the regular TURAGA models. Put the head back on and you’re good to go.
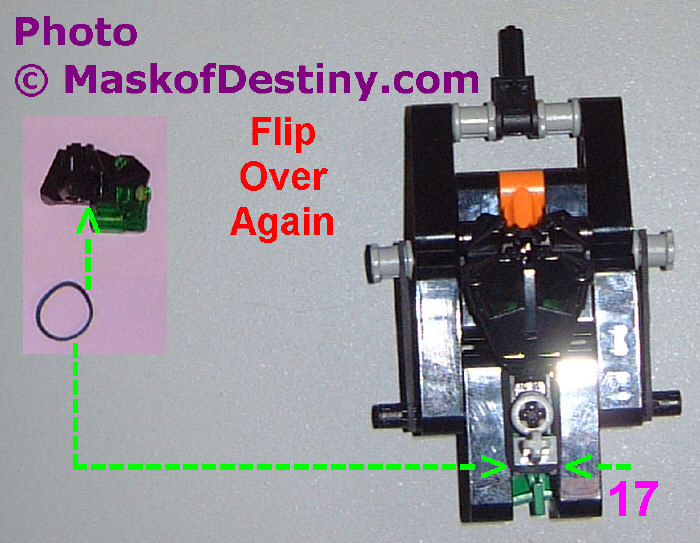
UPDATE: Jon Chown wrote in with a small modification that makes the lower torso work much better. When you are building this model, take a look at Step 12. The lowest pair of ‘L’ shaped pieces should be reversed so the short sections point forward. This is the section that the red and green heads are later mounted to, and they are the ONLY pair of the ‘L’ shaped pieces that should point forward instead of backward. This modification will prevent the red head from sagging, and this means you can skip the rubber band in Step 17.
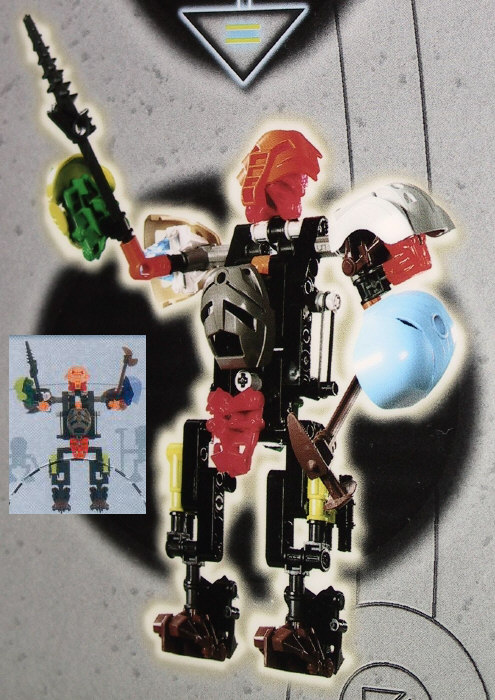
The last picture is of the two reference photos that I used to make this model.

1 Comments
[…] TURAGA NUIThere has been no mention of how this character fits into the story, but it is very similar to the TOA KAITA in that can be built with all six TURAGA models. There are no official instructions for this model, but we have some home-made ones posted here. […]